Build your own Yagi for the Telstra NextG network.
Update 050611: An Optus 900MHz version is [here]
Update 250611: A number of constuctors on the popular WhirlPool forum have shared their expertise.
Their efforts include using a discarded satellite dish; it's a great resource if you're thinking of having a go. [here]
Original article 21 December 2006, updated October 2007
NextG
Telstra has installed NextG in most of it's CDMA phone towers and has great coverage Australia wide.
NextG is excellent for Internet access while Motor Home portable with a laptop and a BigPond supplied PCMCIA card or USB NextG device.
It's performance is good, providing up to 2 MBit/sec speeds in urban areas using nothing more than the tiny built in antenna in the card, but out in the scrub antenna gain is needed. Speeds up to 14Mbit are foreshadowed some time early this year.
The problem to overcome when building a Yagi for the NextG band is the wide bandwidth required:
NextG uplink to the tower ... typically 839.8MHz
NextG downlink to your computer ... typically 884.8MHz
Note: If you want to confirm that NextG is in any particular Telstra tower, use the ACMA web site licence search, which allows you to search for Telstra towers in a particular district (eg. Piper's Brook which services my home QTH at Weymouth).
The Antenna
I adapted a 1,296Mhz 8 element OWA antenna designed by Cebik and modelled it using the free MMANA antenna modelling software. OWA stands for Optimised Wideband Array which have remarkable bandwidth and SWR as you can see below.
Here are the results of the modelling, firstly the polar plot:
SWR response
The SWR response is excellent for the two frequencies required, 839.8MHz and 884.8MHz:
Physical measurements:
Here are the physical measurements, easily cut to within a millimeter accuracy. Element Lengths are alongside each element. The spacings of the driven element and 6 directors are measured from the reflector, and are centre to centre of each element.
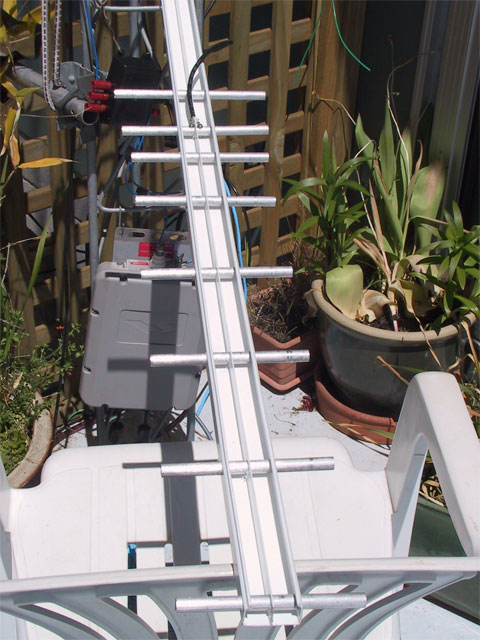
Antenna Overview
Here is an overview of the antenna. The elements are pushed through holes drilled in the cheap plastic conduit boom.
You cannot use a metal boom as it would drastically change the antenna characteristics.
Remember to leave plenty of conduit hanging out the rear of the antenna for mounting the boom to a mast or whatever.
(Ignore the antenna tuner and ham radio and garden stuff in the background, they are not part of this article.)
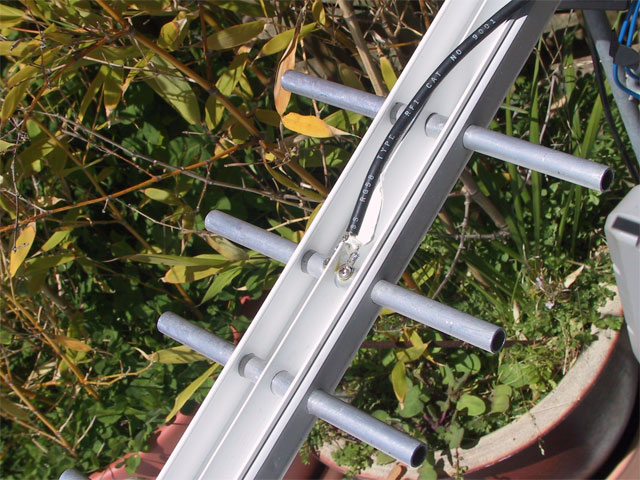
Feed point
Here is a detail of the feed, which is optimised for direct connection to 50 ohm coax.
The driven element is cut into two and joined by a dowel of fibreglass, plastic or wood, with a 1mm gap between the element halves.
The coax is connected directly across the gap as illustrated with tiny screws placed as close to the driven ends as possible.
Other comments:
Coax: Keep the coax length as short as possible and use low loss RG58 foam if you can; terminate it with an FME connector from Dick Smith, Jaycar etc. Many commercial mobile phone "tails" are available to fit FME connectors, I use two, one for my phone and one for the card.
Tails: Buy a commercial phone adapter cable to suit your NextG device. They usually have a phone specific connector on one end and an FME connector on the other. The NextG card uses an MMCX connector which is very tiny. MMCX is used by some GPS manufacturers as well.
I bought my MMCX adapter 'tail' from a Launceston mobile phone supplier, it's about 30cm long; eBay sellers also advertise them.
The antenna works beautifully on the CDMA phone band, and of course NextG phone, so is handy for both Internet and phone access. The gain was sufficient to take the signal from zero to three S bars on my recent trip to Mangana, with a very hilly and poor path to the phone cell. I believe NextG is capable of better then 100 km over good paths.
PS. I've revisited this article since travelling for 7 months across Australia in our 4WD truck and can say the antenna works well!
73